Retro Vegan School Sprinkle Vanilla Cake (Updated!)
If you ever enjoyed school dinners (and I use the word “enjoyed” judicially), you will probably remember that the puds were the best part. I remember jelly and ice cream, arctic roll, angel delight with a curly swirl of some artificial cream, and, my favourite, sponge and custard.
PIN my Easy Vegan Retro School Cake to make later
Dec 22 – recipe edited and improved with new instructions and slight variations to ingredients. I had been unhappy with my sponge bakes recently, finding them to have too many large holes in them. I spent some time researching, and came across this really, really useful post that helped me work out what I was doing wrong with my sponges! In short, not enough blending of the wet ingredients initially, over blending the flour and not banging out air bubbles on the work surface! Methodology fine, execution, poor. Lessons learned, and knowledge shared.
Sometimes the sponge would be jam and coconut, sometimes chocolate (in which case, the custard was pink), other times a simple vanilla sponge.
Because I came from a “divorced family”, I used to have free school dinners, and I would often look out sadly from the school dining room as my friends sat outside and enjoyed their packed lunches in the sunshine. But then, I could enjoy those stodgy puddings, whilst they had to make do with a penguin bar or, for the really unlucky ones, an apple.
Old fashioned cakes always hold a dear place in my heart, they remind me of a simpler, gentler time, and although my own family were not big bakers, we often went to jumble sales. There was always a table full of victoria sponge cakes, scones, rock cakes, bakewell tarts, and one of my all time favourites, the school cake.
Table of Contents
What is Vanilla School Dinner Cake?
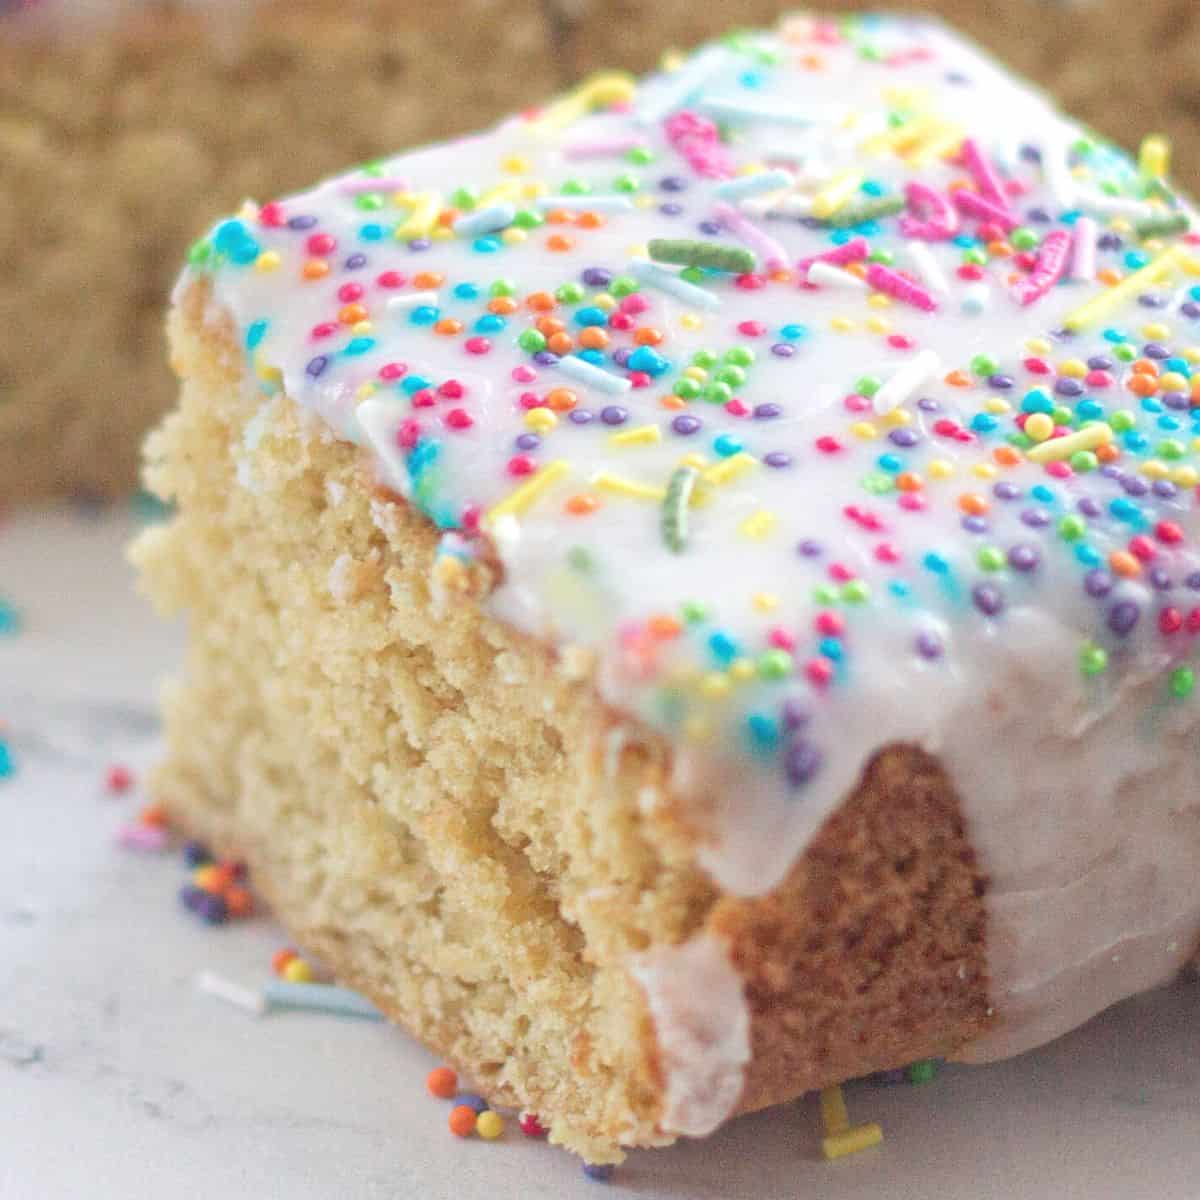
I don’t remember it being called school cake, I think it might have been called hundreds and thousands cake, on account of the sprinkles. What I do know, is that the cake was a light vanilla sponge, topped with the simplest of water icing, and lots of hundreds and thousands. I had completely forgotten about it until I saw it on Pinterest, where it is really popular in Australia, and I also saw it for sale in my local Co-op! Sadly, that version had egg and butter in it.
Ingredients

- Plant-Based Milk. I used soy milk, but you could use coconut milk, almond milk or cashew milk.
- White Sugar. This is a non-negotiable as only white sugar gives that pure vanilla sponge flavour AND colour. Brown sugar adds a more complex flavour that is not needed here. You could, however, use your favourite sugar-substitute.
- Vegan Butter, at room temperature. And it must be at room temperature or soft to spread with a spoon.
- Vanilla Extract. Again, non-negotiable.
- Egg Replacer. I use Orgran but you could use Bob’s Red Mill too. Instead of whisking this separately and adding it to the mixture, I blend this into all the other wet ingredients.
- Plain Flour. I would like to use a cake flour to see if this gives a lighter texture sponge next time.
- Baking Powder.
- Icing Sugar (confectioners sugar), again, this is essential for the icing.
- Sprinkles. I use Dr Oetker brand as they are vegan.
- (This is ONLY a list of ingredients for the recipe; please see recipe card below for complete printable recipe. Or if you use the JUMP TO RECIPE at the top of the page, it will take you directly to the complete recipe.)
Method
This is a really simple cake to make, and can form the basis of many other vanilla sponge sheet cakes.
I use a 9″ square silicone brownie pan because I’m lazy and dislike lining tins. However, if you use a regular tin, make sure to line it.
- Preheat oven to 170c.
- Cream together the very soft vegan butter and the sugar for at least 4 minutes. You can use an electric hand whisk for this.
- Blend in the egg replacer, vanilla and milk, again thoroughly mixing for a couple more minutes
- Sift together the flour, baking powder and salt over the top of the wet ingredients.
- Fold in using a metal spoon only until JUST mixed and there are no lumps of flour visible.
- Pour into your prepared cake tin. Bang the tin hard on the unit several times. This gets rid of excess air bubbles
- Bake for between 25-30 minutes or until it is perfectly risen and golden brown on top. It will spring back when you touch it.
- Leave to cool completely on a wire rack. Once cold, turn out.
- Once cold, you can make the icing.
- Add the icing sugar to a mixing bowl, and, starting with about 2 tbsp cold tap water, start to mix.
- Water icing is really fun to make because it seems like that tiny bit of water won’t do anything, but with continued mixing with a fork, you’ll see it start to form a thick paste.
- You want the icing to be pourable but not runny. More spreadable. So, add more water until you get a spreadable consistency. If you add too much water, don’t panic, simply add a little more icing sugar!
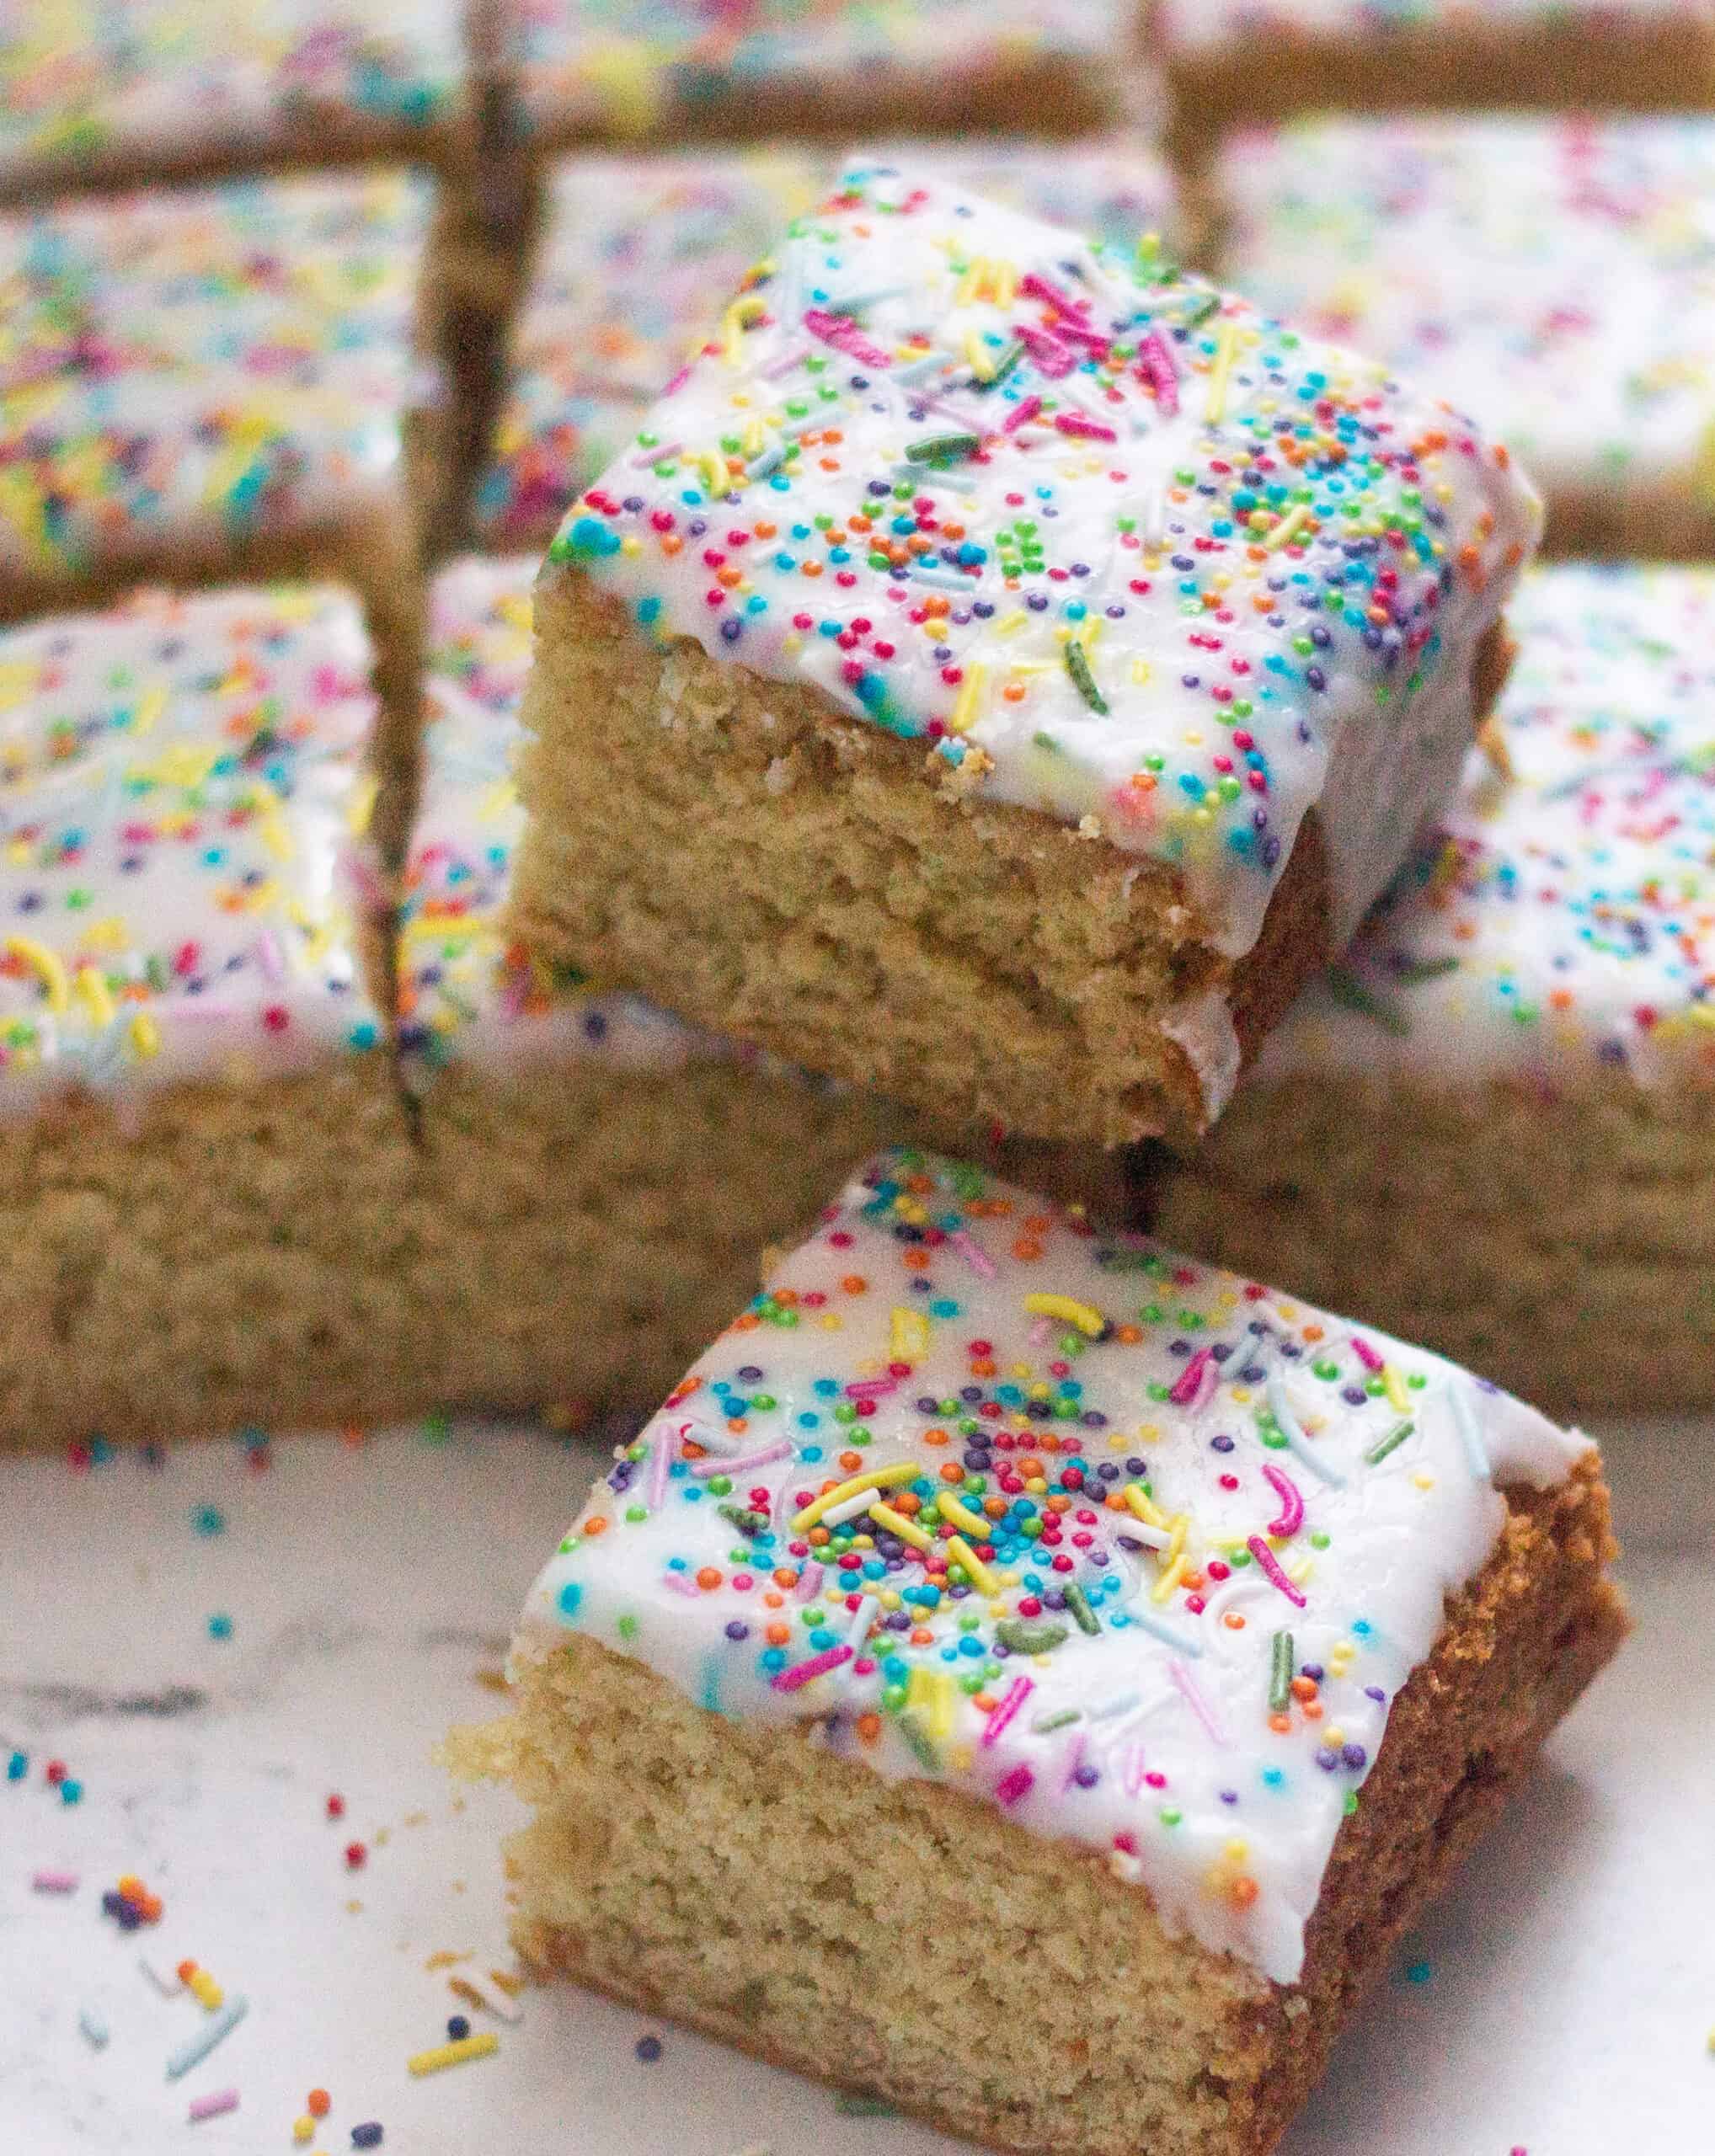
- Carefully spread this over the top of your cake, and then liberally cover with sprinkles.
- Leave to set completely before cutting into squares.
This will last in the tin for about 5 days.
Try my other simple vegan baking recipes
- The Best Vegan Banana Bread
- Easy Vegan Cherry Cake
- Easy Vegan Apple Spice Cake
- Easy and Quick Vegan Carrot Cake
- Perfect Vegan Cream Cheese Icing
- Shortbread Plum Squares
- Lemon Drizzle Loaf Cake
- Easy Spiced Pumpkin Squares
- Chocolate Chip Pumpkin Muffins
- A Classic Pumpkin Pie
- Overnight Cinnamon Rolls
- Old-Fashioned Rock Cakes
- Lamingtons
Easy Vegan Vanilla School Cake (Vanilla Sheet Cake with Sprinkles)

Equipment
- 1 9" Brownie Pan lined
Ingredients
- 1 cup Soy Milk - or plant-based milk of your choice
- 1 cup White Sugar
- 80 g Butter - vegan, softened
- 1 tbsp Egg Replacer - I like to use Orgran
- 3 tbsp Water
- 1 tsp Vanilla Extract
- 1½ cups Plain Flour
- 2 tsp Baking Powder
- pinch Salt
Icing
- 200 g Confectioners Sugar - (icing sugar)
- Water - for mixing
- Sprinkles
Instructions
- Preheat oven to 170c.
- Cream together the very soft vegan butter and the sugar for at least 4 minutes. You can use an electric hand whisk for this.
- Blend in the egg replacer, vanilla and milk, again thoroughly mixing for a couple more minutes.
- Sift together the flour, salt and baking powder over the top of the wet ingredients.
- Fold in using a metal spoon only until JUST mixed and there are no lumps of flour visible.
- Pour into your prepared cake tin. Bang the tin hard on the unit several times. This gets rid of excess air bubbles.
- Bake for between 25-30 minutes or until light golden and springs back to the touch.
- Leave to cool, in the tin, on a cooling rack.
To make the icing
- Once your cake is cool, you can ice it! Whisk together the icing sugar and a little water until you have a thick but smooth and pourable icing. This will only need 2-3 tbsp cold water. Add a little more, drop by drop. If you make it too runny, add a little more icing sugar.
- Spread over the cake, taking care not to go over the edges, then sprinkle generously with sprinkles/hundreds thousands.
- Cut into squares once the icing has set (a couple of hours).
- Store in a tin for up to a week.
Please note that where the recipe asks for milk, butter or yogurt, this refers to any plant-based version that you prefer.


Hi! What can you use to substitute the egg replacer? 🙂
Hi Millie, you could try two tablespoons of additional yogurt instead, or even a flax egg (1 tbsp ground flaxseed whisked up with 2 tbsp water).
Oh man, my daughter and I made this today. After folding the mix didn’t appear good looking at all, after cooking it was uneven, not risen well and once cooked the underside was still uncooked despite 30 minutes and checking with a skewer. I wonder where it went wrong, we still look forward to trying this if cooking the base longer completes the cooking process
Hmmm, did you change any of the ingredients? You may find that you need to bake it for a little longer, my oven runs quite hot and because it’s gas, it cooks from underneath, so maybe add an additional 5-10 minutes. I hope that it works for you!